XFCE Monitor + Bluetooth Setup.
Published 11 July 2021 at Yours, Kewbish. 2,057 words. Subscribe via RSS.
Introduction
I suppose it wasn’t particularly ‘recently’ anymore, but I quote-unquote ‘recently’ redid my laptop setup. (It’s been at least three months now, but I’ve been procrastinating on the writeup for unknown reasons.) My previous setup, if you can even call it that, was the typical hunching over my laptop, staring into the depths of a 15" screen for hours on end situation. Not very good for posture, and probably not very good for my eyesight either. I went through the better part of the pandemic Zooming from there, but my parents and I decided it was probably not a great idea to continue like this. So, I acquired a monitor, a clamshell stand, a Bluetooth keyboard and mouse, a webcam, and off I went.
Setting all of this up probably would have been easier on Ubuntu with the normal DE and everything, but when I got into Linux, I went with Manjaro + XFCE as a DE + i3 for a WM. Most of the tutorials I found for setting up display profiles on monitor connect, pairing Bluetooth peripherals, and wrangling the power manager to avoid suspending on lid close were mostly for GNOME Ubuntu. The few I found for Manjaro were quite convoluted, and would be using a different DE or device. I was left to trawl my way through the Arch Linux wiki and bodge together pieces of different writeups for what fit my system - it wasn’t a very straightforward process. Since I don’t want to bother having to figure everything out from scratch if I reinstall, I’ve decided to put together what I remember doing to Make Everything Just Work™. If you’re looking for a tutorial that’ll go through how to replicate a system where:
- your laptop is running Manjaro with XFCE as a DE,
- your laptop is docked in clamshell mode,
- your laptop’s only display is rendering to an external monitor (specifically Dell, though I doubt this makes a difference), and
- your laptop’s connected to a Microsoft Designer Desktop Bluetooth keyboard and mouse (monitor is irrelevant but this model is, I think) you’re in the right place.
This’ll be a decently technical post, but it’s here to serve as a semi-tutorial for how to replicate my setup, just in case I have to reset my laptop or someone out there has the exact same, very niche problem as I did. I won’t cover any of the more general advice, so there’s a decent chance this is entirely irrelevant to you. Apologies, please check out one of the numerous other tutorials I’m sure are out there. As with most of my articles here, take this with a grain of salt as well, and if what I’ve done doesn’t quite work on your setup, consider this your liability waiver: don’t execute any of the commands or follow any of my instructions unless you understand them, and I hereby cleanse myself of any responsibility for you messing up.
Monitor Displays
Now that we’ve got that out of the way, let’s start with the monitor setup itself. I have a Dell monitor - I don’t think the model number is relevant at all, since I just plugged the monitor in via HDMI. (I’m fairly certain this should be roughly the same for most other monitors.) What’s a bit tricky, however, is the monitor display setup. It took a while for me to get how to turn on and off displays, since I just wanted my monitor on, and not have my laptop screen mirroring it.
Plug in your monitor to your laptop and open Figure 1. When you first open Display.xfce4-display-settings, or just search for Display. You should have something like this:
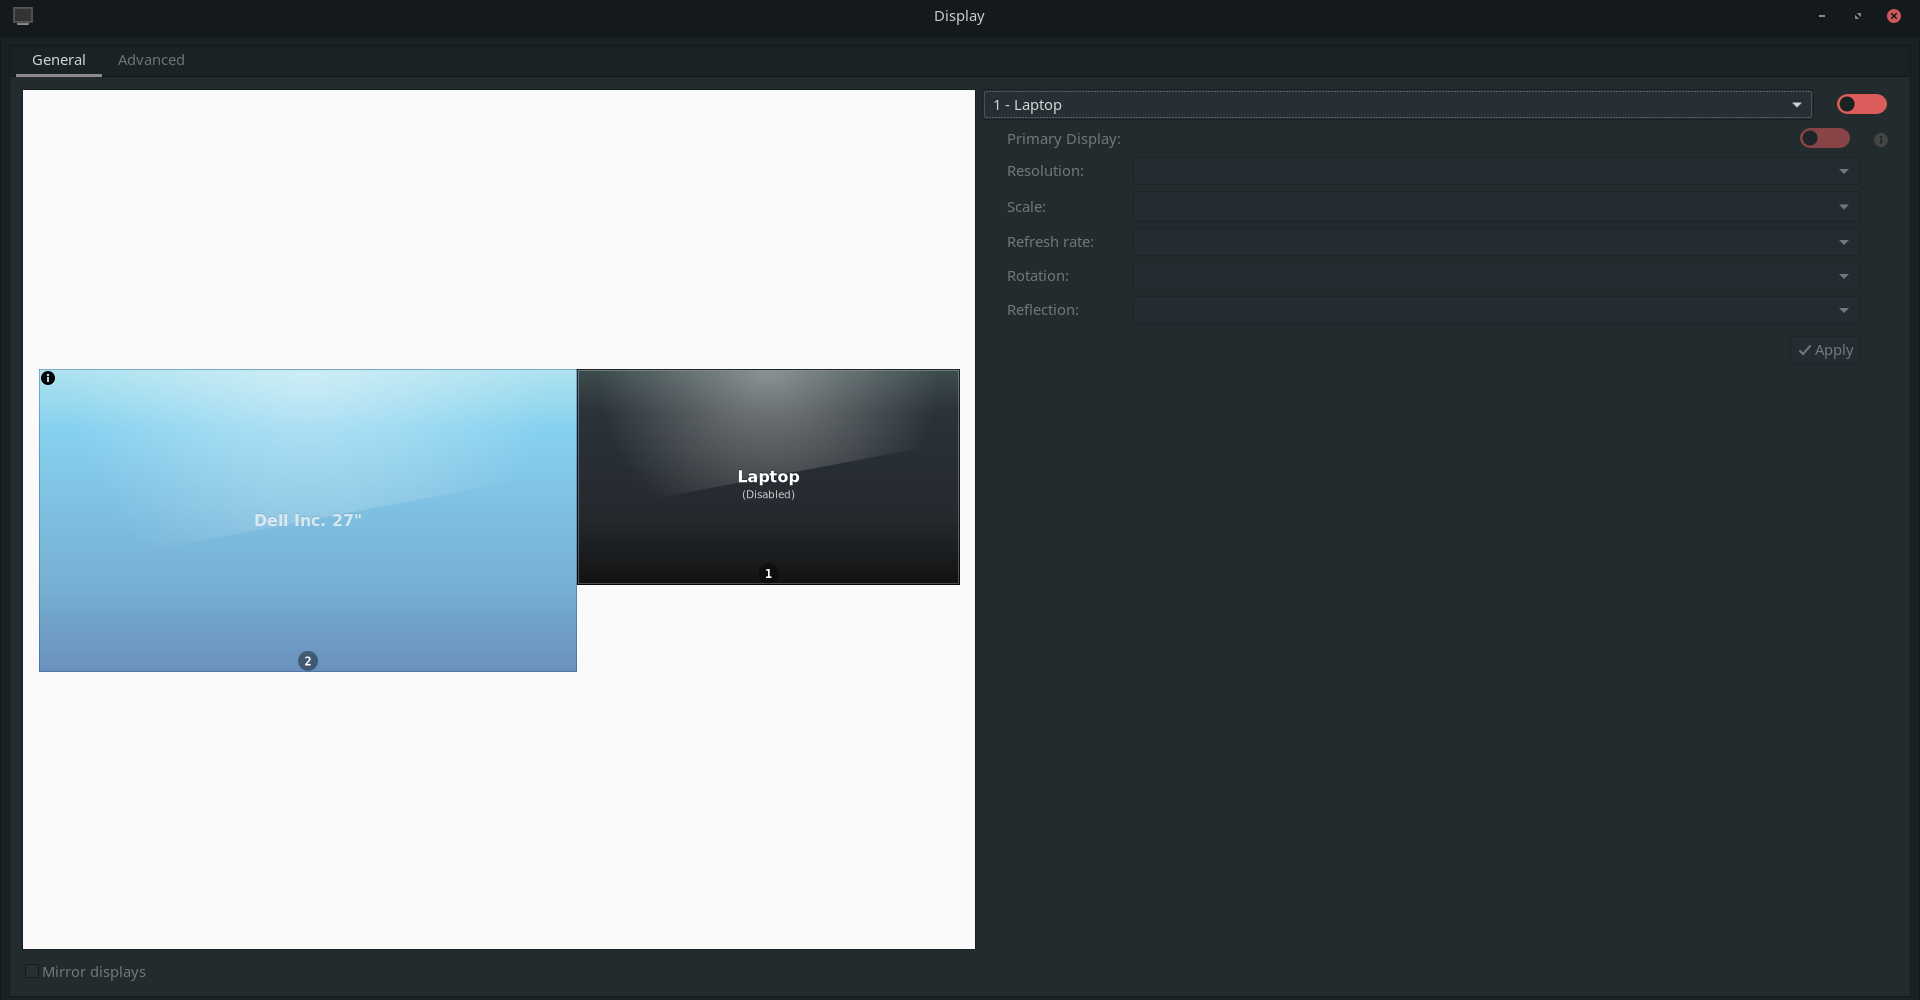
Click the dropdown that currently reads ‘1 - Laptop’, and switch to ‘2 - Dell Inc.’, followed by the screen size of your monitor. Have fun playing with any of the bottom settings, but once you’re done, toggle ‘primary display’ to on, and ensure the toggle beside the monitor name is still on. At this point, you can go ahead and drag the monitor displays on the left side of the screen around, but nothing should happen.
If you want to set up display profiles, so that your laptop automatically switches between monitor and laptop screen as primary display (for example, when you’re on the go and your monitor’s not plugged in), you’ll have to tab over to the Advanced menu.
Figure 2. The Advanced Display menu.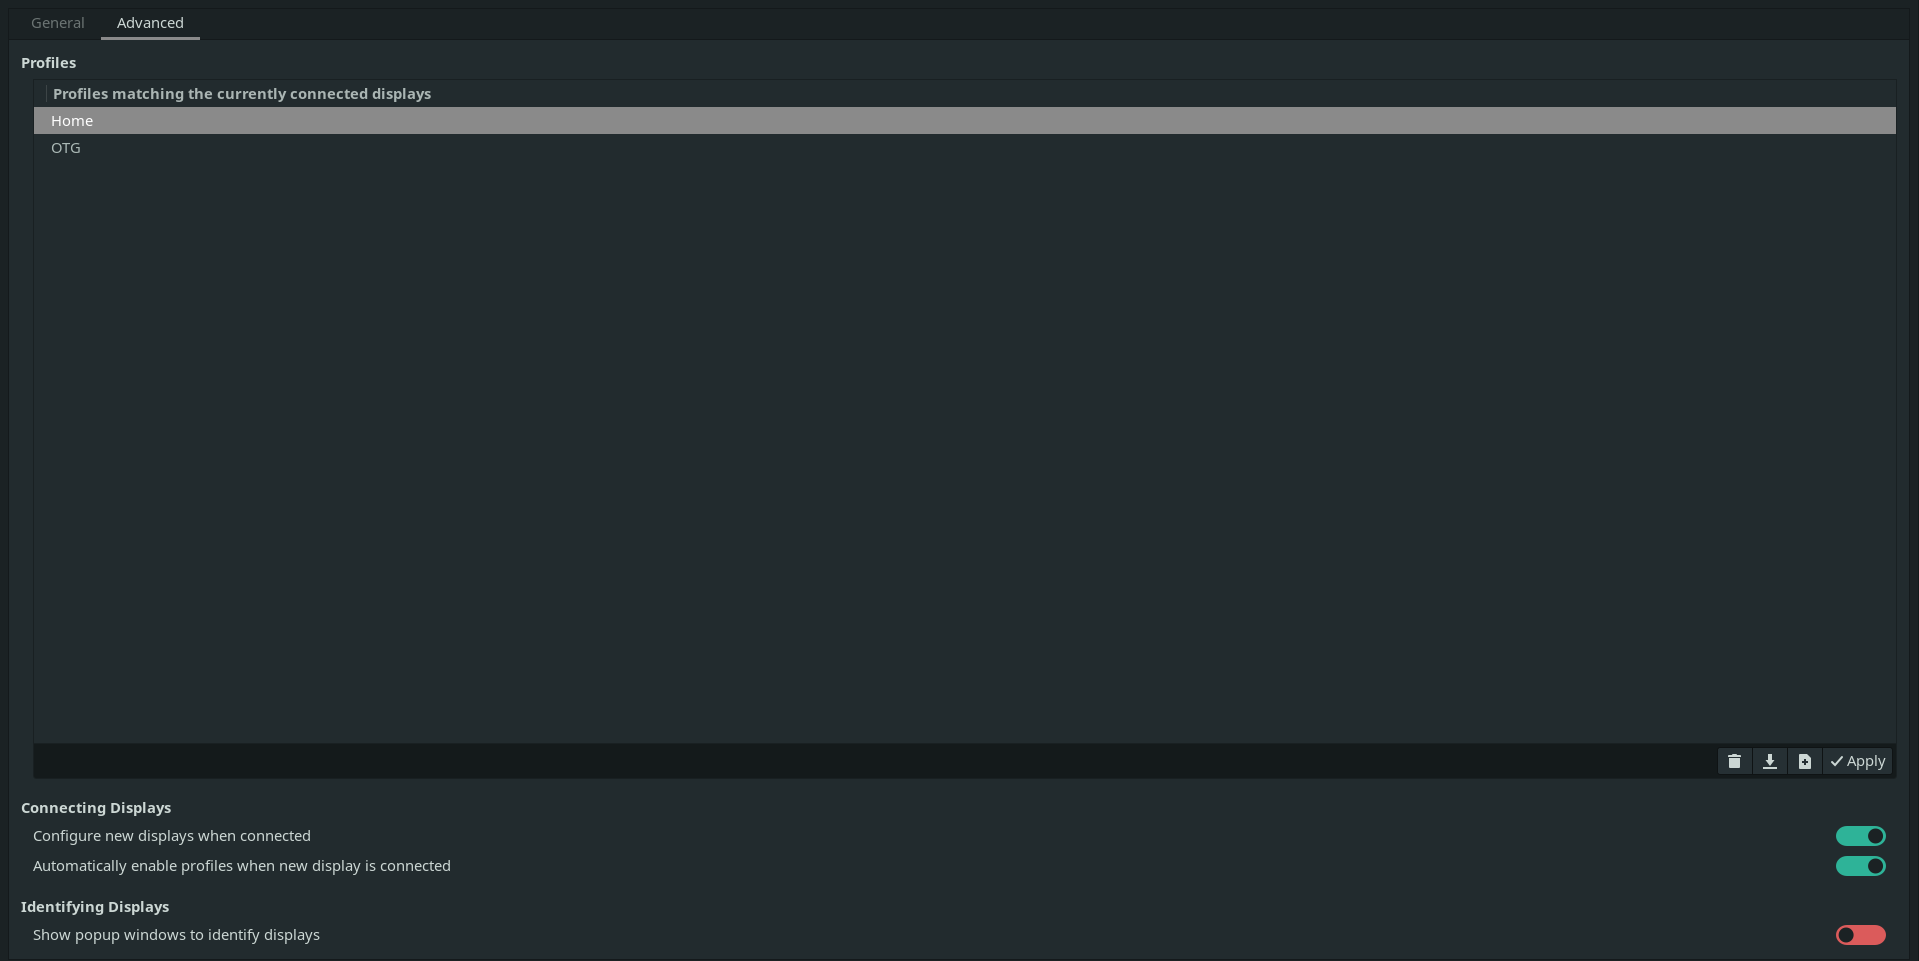
Random note: sometimes plugging and unplugging my monitor disables my WiFi for no apparent reason, but this is easily fixed with sudo wifi on in the terminal.
Clamshell Mode
Now that the monitor’s on and working as expected, it’s time to set up a pseudo-clamshell mode for your laptop. XFCE Power Settings are a bit finicky - what I found in old tutorials was an outdated setting that automatically went and set it so the laptop wouldn’t suspend on lid close, but from what I can see, that’s gone now. There are a couple files you’ll have to edit:
In /etc/systemd/logind.conf:
HandleLidSwitch=ignore
HandleLidSwitchExternalPower=ignore
HandleLidSwitchDocked=ignore
LidSwitchIgnoreInhibited=no
In /etc/UPower/UPower.conf:
IgnoreLid=true
And for good measure, tweak the Display settings in xfce4-power-manager to not blank. I tried just the systemd logind.conf fix, and just the UPower.conf fix, but it seems that it didn’t quite work until I’d edited both files - not sure why. After all this, reboot, and try closing the laptop lid (while having it plugged into your monitor). Hopefully, your laptop should remain on. (From now on, remember to properly suspend your laptop before closing it when it’s not docked, if the suspend-on-close feature was something you were used to.)
I docked my laptop vertically in one of those clamshell holders off Amazon. When suspended, my laptop automatically wakes if I open the lid, so whenever I want to turn on my laptop, I crack it open a bit in the dock. (I had to widen the holder a bit so I could open my laptop enough for the magnetic switch to disengage and detect my laptop was open.)
Bluetooth Peripherals
Since your laptop will mostly now be docked, you’ll still need some way to control it - I opted for a Bluetooth keyboard and mouse. I won’t go into starting Bluetooth services and autoenabling controllers on startup, but I’ll go over how I managed to get my mouse and keyboard both working. Pairing Bluetooth devices is generally pretty easy with blueman’s blueman-manager, so I thought that this’d be the simplest part of the entire process. (And hey, I was only half wrong.)
Figure 3. Blueman pairing.
Now, onto the fun bit. Trying to pair my keyboard to my laptop was a pain, but I finally found some hints in the Arch Linux wiki page. You’ll need bluez-utils in addition to Blueman for this bit, so pull that from whatever repository you decide to use. Similar to the wiki, we’ll be using bluetoothctl for the pairing process.
Run bluetoothctl to enter the tool, and enter power on to boot up the controller. Hopefully, no error messages appear. Then, enter agent KeyboardOnly and default-agent to limit the search to keyboards. Next, run pairable on to put the laptop’s controller into pairing mode, and then hold the little button on the left underside of the keyboard to put the keyboard into pairing mode. Once you enter scan on, the keyboard should be discovered pretty quickly. To actually pair your keyboard, run pair , followed by the Bluetooth MAC address that the scanner spit out. For example, if you had something like 01:02:03:04:05:06, run pair 01:02:03:04:05:06. The Microsoft Designer Keyboard is interesting in that it demands some PIN to be entered, so enter that physically on the Bluetooth keyboard. Then run trust 01:02:03:04:05:06 to trust the device, and connect 01:02:03:04:05:06 to connect. At this point, you can quit the tool, and the keyboard should be connected and working. It should also auto-connect once you turn your laptop on.
Sometimes, the keyboard and mouse don’t connect right away when I turn my laptop on (or, strangely, one’ll connect but not the other, and then they’ll switch or lag for a while). This is fixed by using whichever device is connected to suspend the laptop again. Once it rewakes, I find that most connection lag errors are gone, but maybe this has nothing to do with the keyboard and mouse and is just an issue with my Bluetooth controller.
Conclusion
Congratulations! You should now, in theory and with a tablespoon or two of good luck, have an aesthetic laptop setup with a nice comfortable monitor and a very satisfying keyboard1. Future me, if you’re reading this: try not to mess up whatever you’ve just done to warrant a reset now again. I doubt anyone’ll properly need this guide, but hey, it at least will help me when I unexpectedly break everything sometime in the future.
It doesn’t particularly feel like it, but I suppose it’s summer vacation now. I’ve been spending maybe a bit too much time in the same old routines of studying things that I’m sure I’ll do fine in even if I didn’t bother previewing. It’s nice to have a lot more freedom in what, when, and how I’m learning, however - having this much time to dive into topics I’m interested in and self-study has been something I’ve been looking forward to for a long time. I’ve also been trying to do more creative things, and spend more time writing, so hopefully I’ll be more consistent with this blog as well. (I know I append some version of this to each post, but I’ve gone and made a backlog of ideas, and it’s something I’ve really decided I need to devote more time to in the future.) I’m pretty sure writing about vaguely technical topics and slaving away over online courses probably isn’t everyone’s idea of an ideal summer, but to me, it really is the perfect transition to university.
-
I genuinely like the feel of this keyboard. I’ve never tried mechanical keyboards, and they seem a bit clunky; the original keyboard built into my laptop is a bit too soft. This keyboard is a really nice balanace between easy to type on without a rather flimsy feeling - and it sounds pretty aesthetic as well, if that’s somewhere on your criteria. ↩︎