Presenting in Figma.
Published 31 December 2023 at Yours, Kewbish. 1,358 words. Subscribe via RSS.
I gave a lightning talk recently at NeovimConf 2023, sharing a bit about my personal notetaking system in Vim. The content of the talk was similar to my previous A Plaintext Zettelkasten post, with less Zettelkasten theory and more Vim keybinds. The conference was streamed live on Twitch, and I got to chat a bit with folks while watching my (prerecorded) talk. Here’s the embed:
I’d highly recommend checking out some of the other talks — the talk playlist will be updated here.
People seemed to like my setup and appreciate how I nerded out over it, which was heartwarming1. I also got some good feedback on my slides’ aesthetic (you can see them in the video) and a few questions on how I made them.
This is a short post on creating presentations in Figma, with a few links to resources I’ve used that might make your design experience a little easier.
Why Figma?
I designed and exported them all in Figma, which I think is a fairly unconventional use for the tool. I’ve previously done my Directed Studies (a research course) slides in Figma2 and had good experience doing so. Figma is already the defacto design tool for many web developers, so it’s a good choice for presentations too if you have Figma components or libraries you want to reuse.
I don’t use traditional presentation tools like Powerpoint or LibreOffice Impress, since I find it hard to get started with a blank (or very generic) slate. In the past, I’ve used Canva for small presentations like these since it has such a vast library of templates — the little things like extra clip art or background assets really makes slides look polished.
I tried Figma for slides recently, first for my Directed Studies slides, then for this lightning talk, because I’ve had pre-existing assets in Figma that I wanted to reuse in high quality in my presentations. For my Directed Studies project, I had diagrams from our paper; for my lightning talk, I wanted to use the branding elements from my website, like my gradient and sparkles. Figma makes it easier to design things more precisely than Canva with autolayout, and it’s nice to be able to pull from my Figma library without converting to a flat-file image format and back.
Workflow
Throughout this post, I’ll be using my Directed Studies slides as a running example. Here’s what my Figma file looked like:
Figure 1. Slides overview
You can create slides with Frames in Figma. Click the grid Frame icon, or press F. Select Presentation > Slide 16:9.
I like to create a base frame for my slides, so I can have a consistent background. Once you’ve designed this, you can select frames and Ctrl-C / Ctrl-V to place them in series. Figma lays them out automatically in a nice line, which makes scrolling through a presentation easier. Creating slides out-of-order is a little more annoying, since you’ll have to drag all the frames into line, so I tend to work through my slides in-order.
After I’m done with my slides, I use Figma’s Prototype tool to wire the transitions up. You can create a new Flow by clicking on your title slide frame, then right-clicking and selecting ‘Add Starting Point’. Then, in Prototype mode, you can hover over the side of a frame to wire it to the next slide. I set each transition to ‘On click, navigate to [frame for next slide], instant’. There are some animation options available though, like wipes, dissolves, and notably, Smart Animate, which smoothly animates between objects duplicated across frames. This part is a little tedious, but I haven’t found a plugin that’ll do it for me yet.
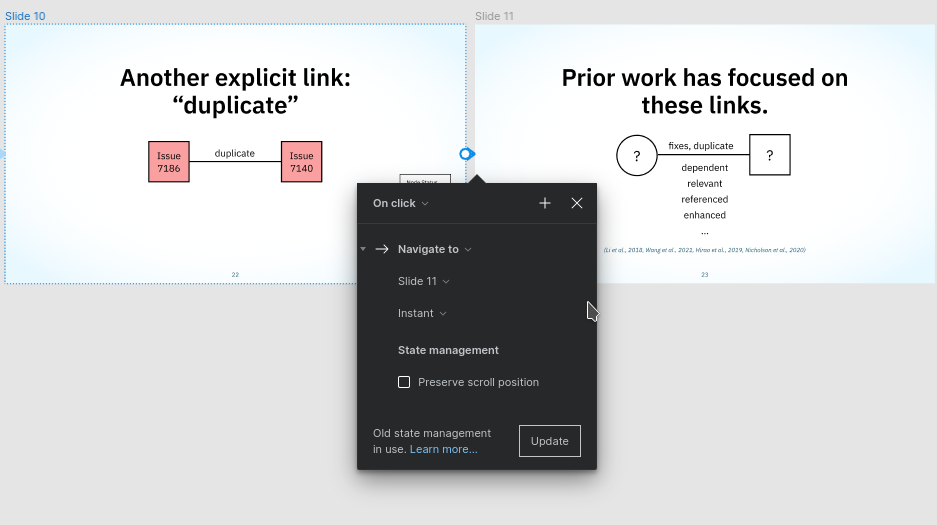
Figure 2. Transitioning between slides
Finally, you can present with the Play button in the upper-right hand corner. You can move between slides with the arrow keys, as in Powerpoint.
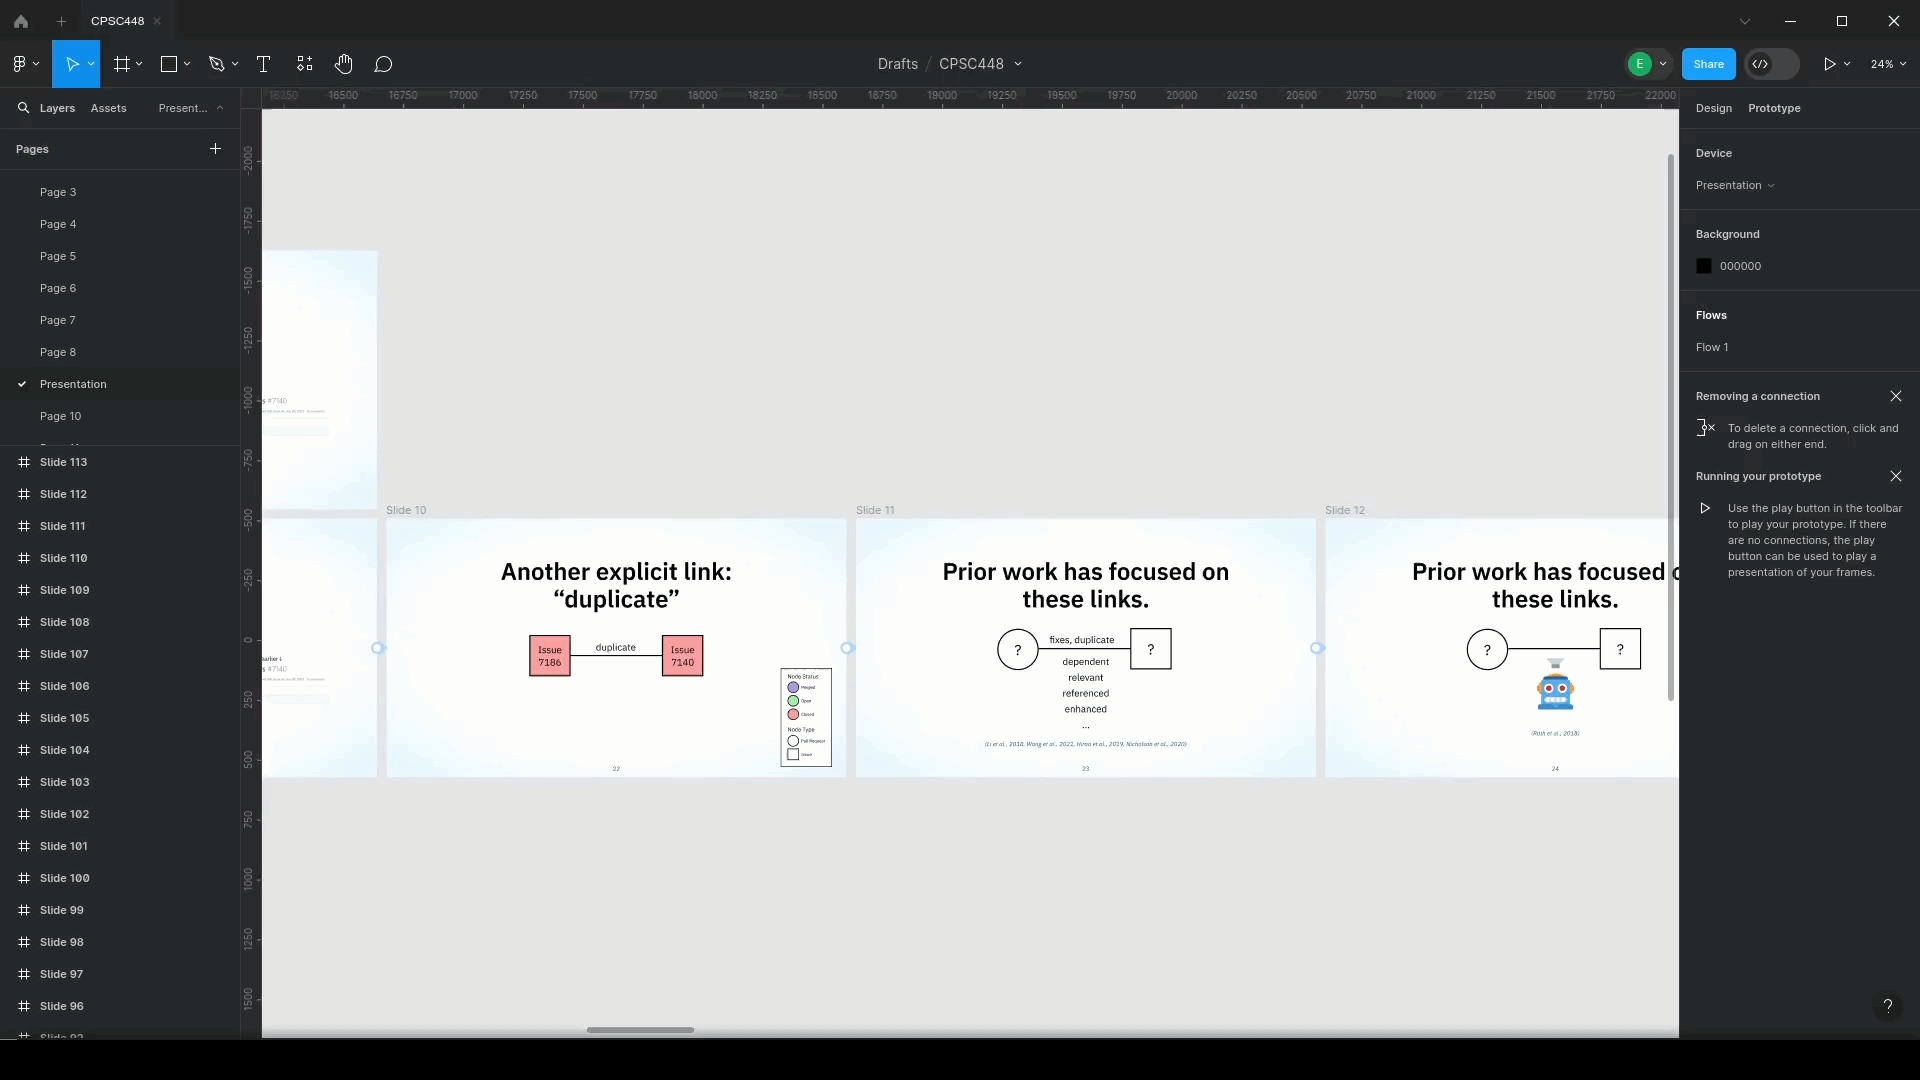
Figure 3. Demoing the presentation
You can also export each slide as a PNG by selecting all your frames and heading to Design > Export > PNG > Export X layers. I used this in my NeovimConf talk, as I recorded my webcam separately from my slides.
Miscellaneous Tips
For in-slide animations, I duplicated a slide multiple times and added Prototype transitions between each subpart of the slide. I used this for animating bullet points that appeared on each keypress. You might be able to implement this more efficiently with Variables, but I typically only have at most three subparts per slide, so I haven’t explored this yet.
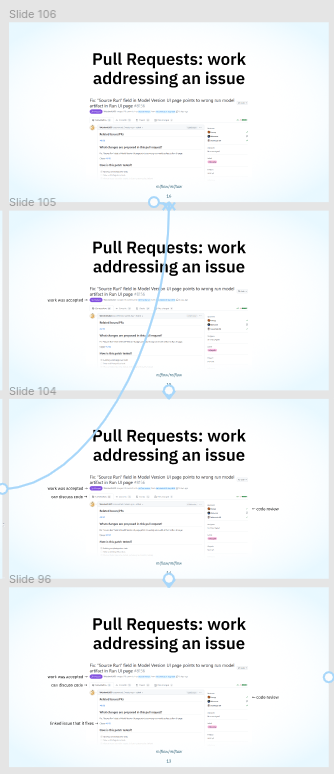
Figure 4. Not a very DRY presentation
For page numbering, I’ve used Pitchdeck, a Figma plugin, in the past. You can add the plugin normally via the Figma Components menu, but beware some features like PDF export and such are paywalled. Pitchdeck is quite fully-featured and appears to do the in-slide animations I’d be looking for, but I found their interface unintuitive and a little overpowered for my needs.
To add slide numbering, open Pitchdeck and click the Page icon in the upper-left of the plugin window. Toggle ‘Enable auto slide numbers’ to on. You can customize slide numbering styling here as well, which I think is a nice way to tie into the rest of your presentation branding. If you’re using my janky method of duplicating slides for in-slide animations, Pitchdeck will see each individual frame as a new slide to number, so I resorted to deleting everything except the last subpart of my animation, running the auto-slide numbers, then recreating my animation. Try to add slide numbers once at the very end if you forsee this happening.
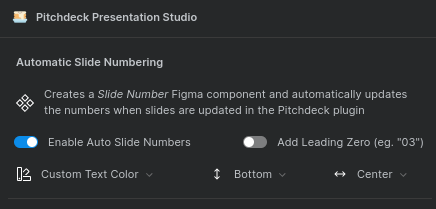
Figure 5. Adding slide numbering in Pitchdeck
A parting tip I’d give is that it really helps if little things like asset theming ties in well together. I was able to reuse the metallic gradient I use for titles on this blog (see this article header) for my titles as well as for my webcam frame and its decorations3.
Conclusion
I’m far from a Figma power user, but it’s fairly easy to create cohesive presentations in Figma even with basic tools. I’d love to reuse my NeovimConf template for future talks (with different content, of course!)
Speaking of speaking, I’d like to apply for more opportunities in 2024. Writing and rehearsing my NeovimConf talk was a great learning experience in terms of Vim content, even though I’d already done quite a bit of tinkering myself, not to mention very validating to get to chat with other Neovim-adjacent folks and be able to share a bit about my unique workflows. I have a lot to learn in terms of storytelling and talk structure — I got feedback from a friend mentioning how they thought I was listing off keymaps without showing how they fit together well in a system. Figuring out how to explain things you’re passionate about in an accessible way is trickier than it seems, especially since you have all the pictures and mental models in your head and it’s easy to assume others do too. Public speaking is also far out of my comfort zone. This was a pre-recorded talk, but I’d like to challenge myself to give something live if I have the opportunity.
Thank you again to the NeovimConf team for putting together and hosting such a fun conference! I met plenty of fellow Vim nerds and learned many fun tricks, and all in all had a great time. Can’t wait to rewatch the talks and see what NeovimConf 2024 holds!
-
I will try not to fangirl too hard over the fact that the Primeagen said, and I quote: “this notetaking stuff is pretty dang cool”. ↩︎
-
Did you know that Gists on GitHub are just like full repositories? You can
git clone, commit other files, and push to them. The default Gist web UI doesn’t allow for uploading binary files, so I used this workaround to host my slides in a Gist repo. ↩︎ -
You can click any element, go to
Fill > Styles [the four dots icon] > +to copy an element’s fill for reuse. This saved a lot of time compared to having to copy-paste fills between everything. ↩︎